Putting In the Hours: Relighting Skytown
Lighting’s always been my favorite part of CG, probably thanks to some movie I watched way too young. Lately I’ve felt the itch to do it more, so I’m getting back into the habit: jumping into Unreal, grabbing an environment, setting cameras, and moving lights around. I treat these like little photography trips and post them as a quick journal. Fast passes, not precious pieces. - Safari
Before and After: Same World, Different Read

Environment assets from Unreal Marketplace (FAB)
This one uses a free environment from the Unreal FAB store.
I couldn’t get the assets converted to Nanite without Unreal crashing, but Lumen worked just fine with a few post-process tweaks. Good enough for what this needed to be.
The original environment felt too bright, and evenly lit. Everything was visible at once, and the mood was doing very little storytelling. I wanted to relight and push things towards dusk. Lower exposure, deeper contrast, and more selective lighting.
Guide a viewers eyes towards areas that I felt important. Windows glow. Street lights and shadows to pull focus. The same assets and layout but a completely different feeling.
How the UE Lighting Is Set Up

Most of the changes started in the initial town center shot.
My rough order:
Adjust camera settings first
Dial in the skylight position and intensity
Set up spotlights for the sun and key direction
I usually avoid using a single Directional Light to light the whole scene. It hits everything evenly, and if I want dappled lighting (which I almost always do), I end up relying on light functions or giant shadow-casting shapes. That gets tedious fast.
Worse, if I move the sun later, all that work breaks. Localized lights give me way more control and let the scene evolve without everything falling apart.
A small but important Sequencer tip
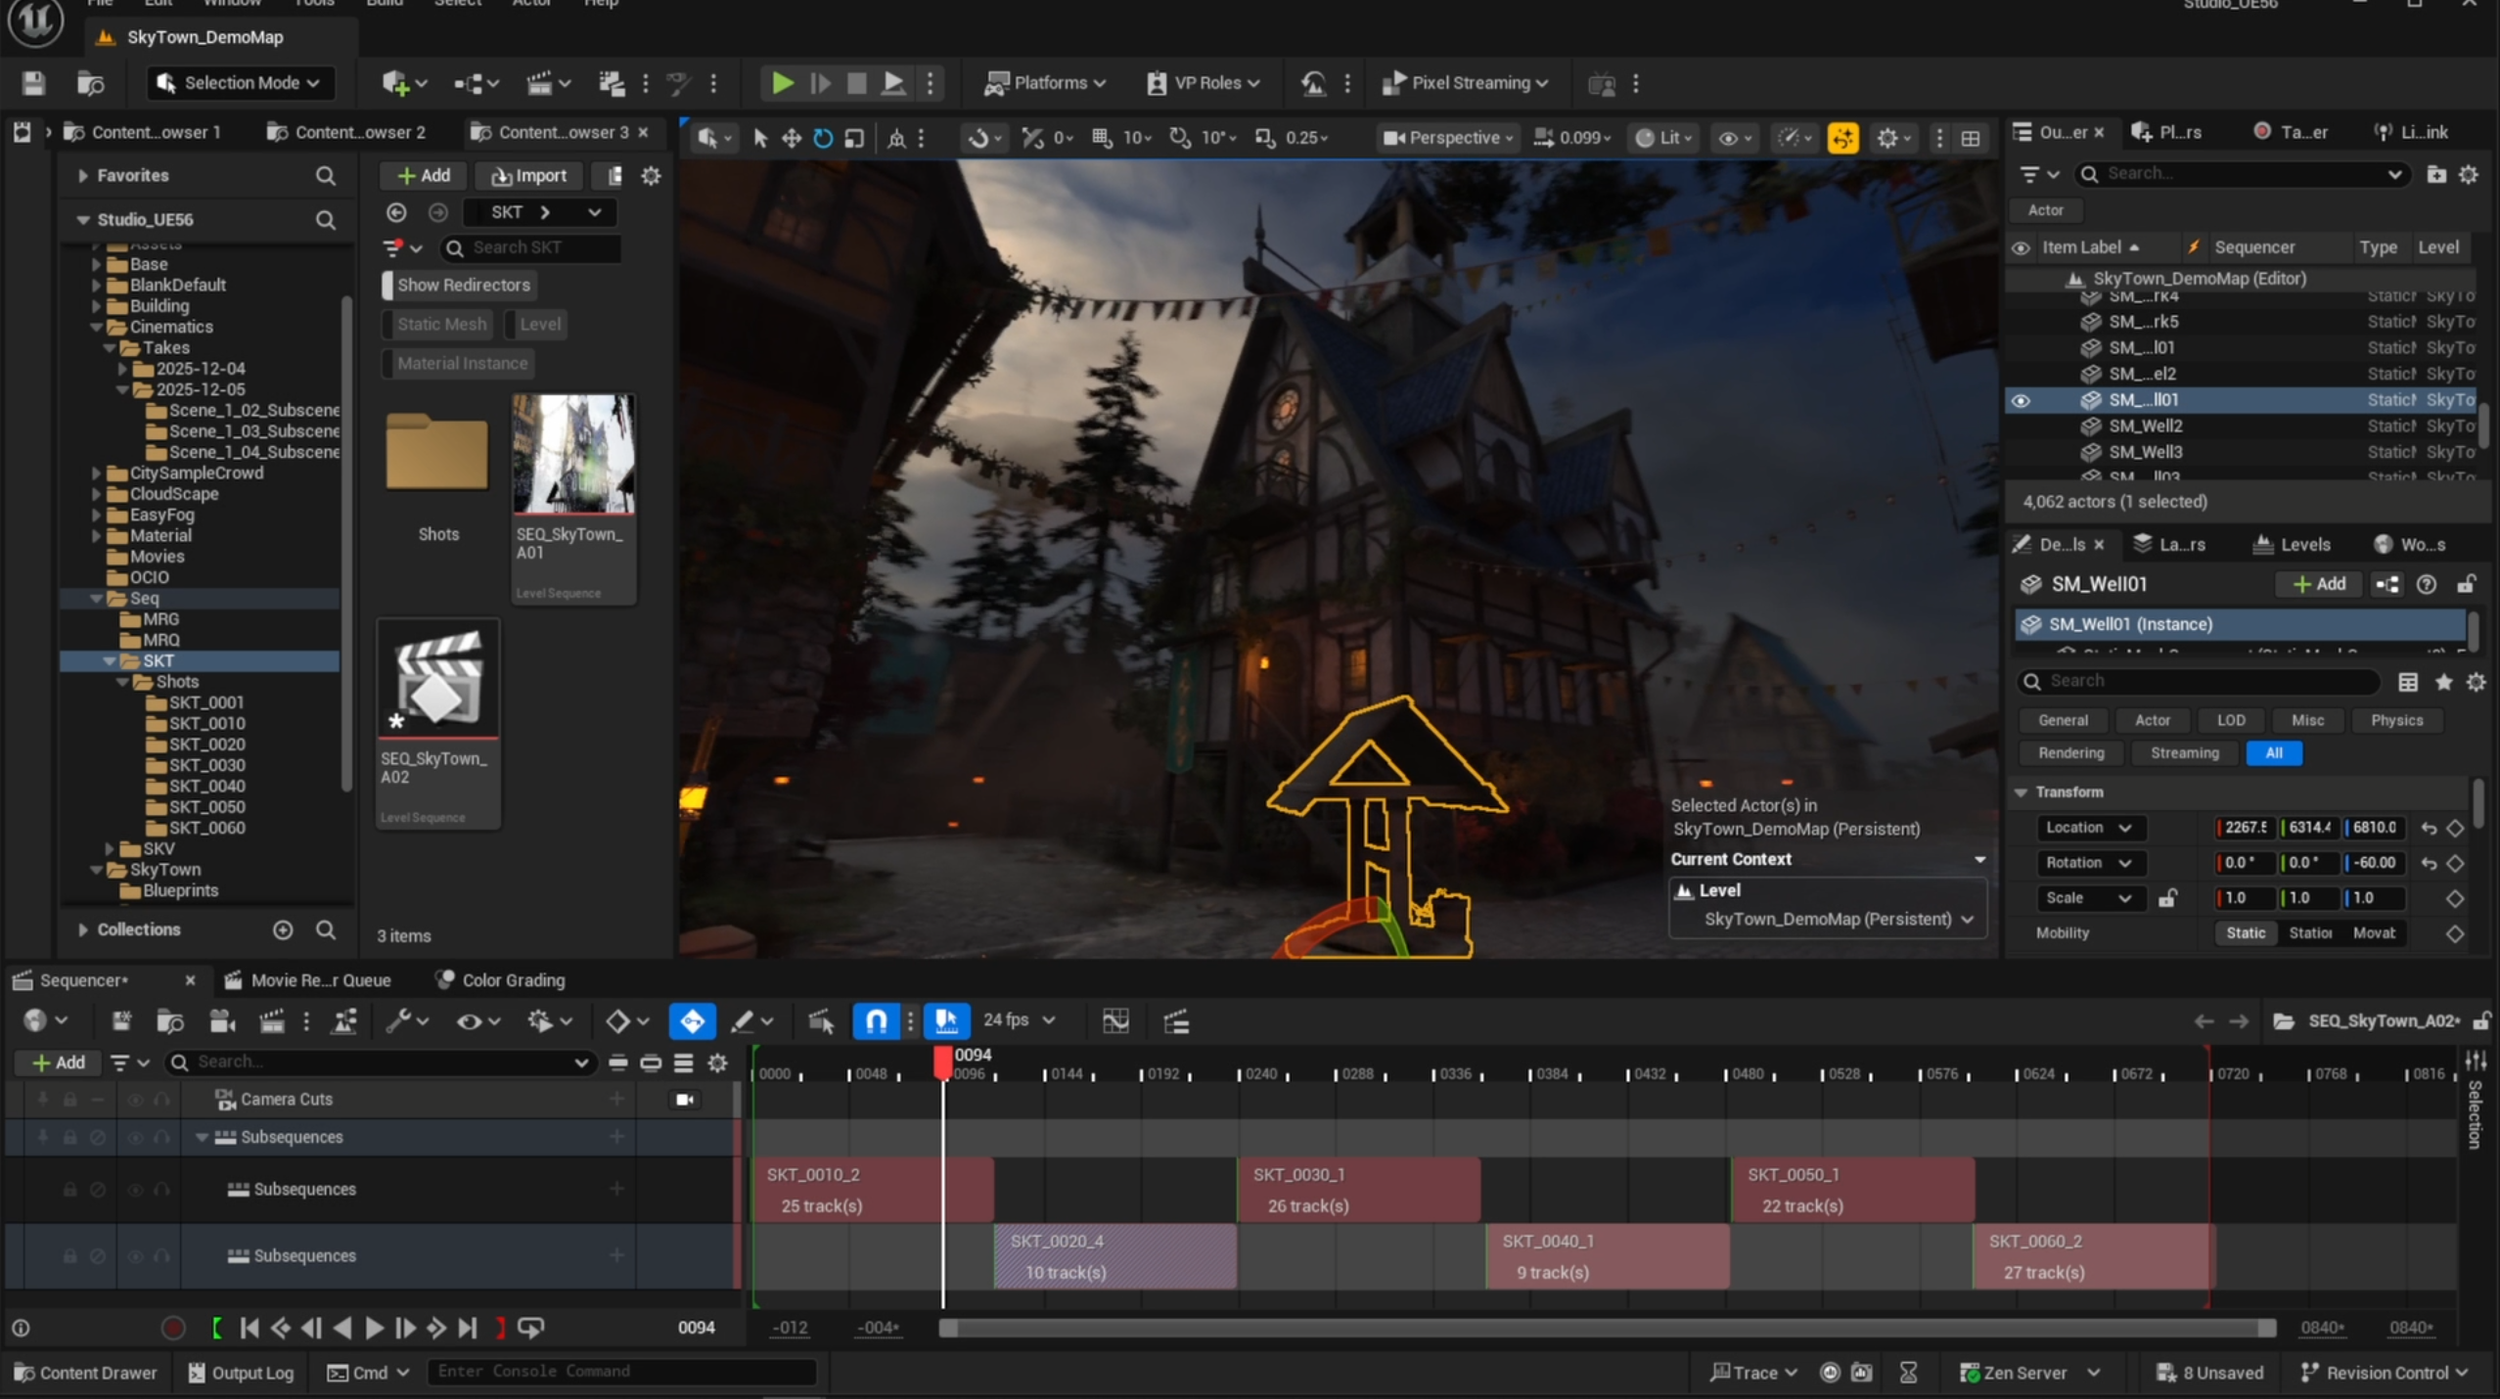
Using spawnable actors in the Level Sequencer for each shot
If you’re creating a new Sequence for a shot in Unreal, always make sure you’re keyframing within that sequence. If you’re not, you’re modifying the base scene and messing up your original setup without realizing it.
A better workflow is to make certain lights and environment elements, like fog cards, spawnables inside the sequence. That way you can adjust settings freely without needing to keyframe everything or risk breaking other shots.
It’s a small habit that saves a lot of cleanup later.
5 Lighting and Composition Tips
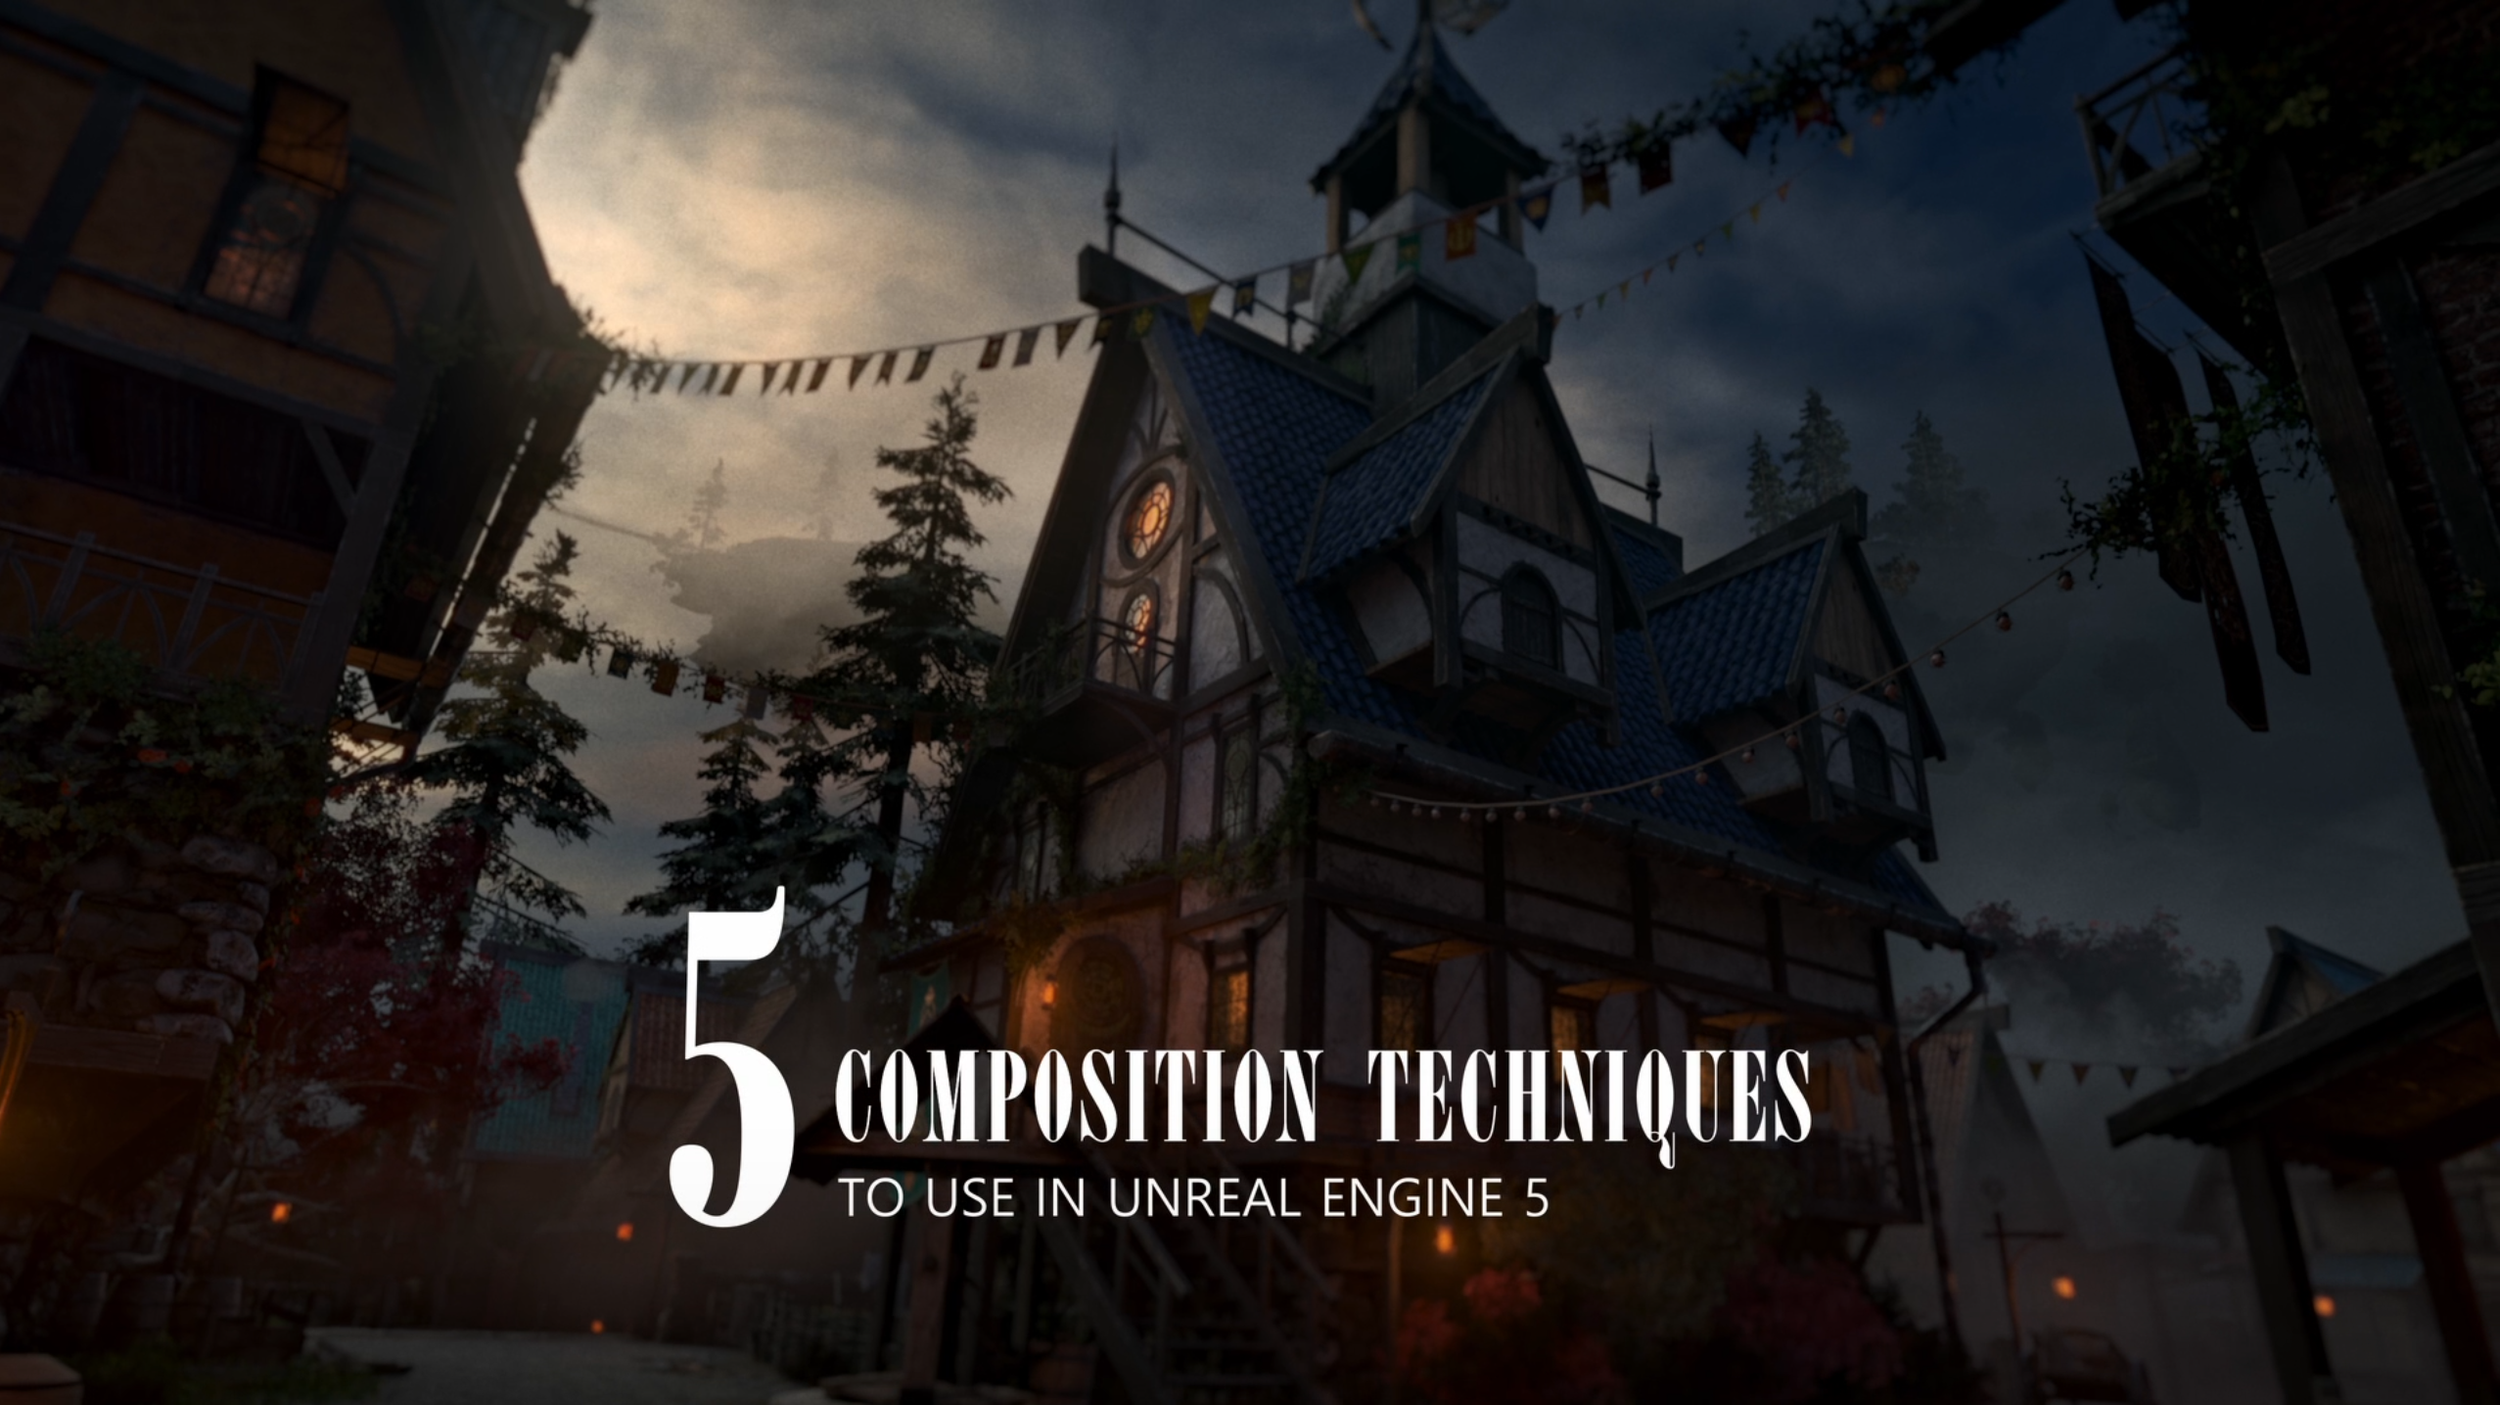
Composition techniques used in film and photography to help CG cameras
Negative Space: Let darkness do some of the work. Areas you don’t light help define mood and give the lit elements more weight.
Split-Frame Symmetry: Use light to reinforce balance across the frame, then break it slightly to keep the image from feeling static.
Layered Tri-Zone: Think in foreground, midground, and background. Each layer should sit at a different light level so the space reads with depth.
Diagonal Leading Zone: Use angled light or shadow to pull the eye through the frame instead of lighting everything head-on.
Frame Within a Frame: Use doorways, windows, or overhangs as natural masks, lighting the subject inside them to create focus and scale.